Scheduling an Exam
For new applicants, please create a NICET account. You will need to fill out details such as your contact information.
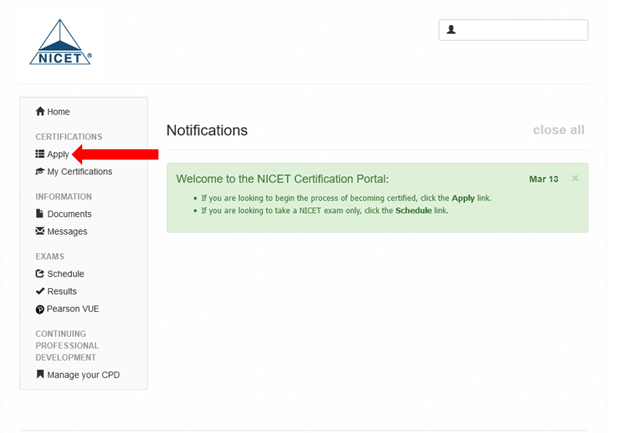
Once you have created and/or logged in to your NICET account, the first step is to add an “application card” to your home screen. Click “Apply” in the navigation bar to see the cards for every certification NICET offers.
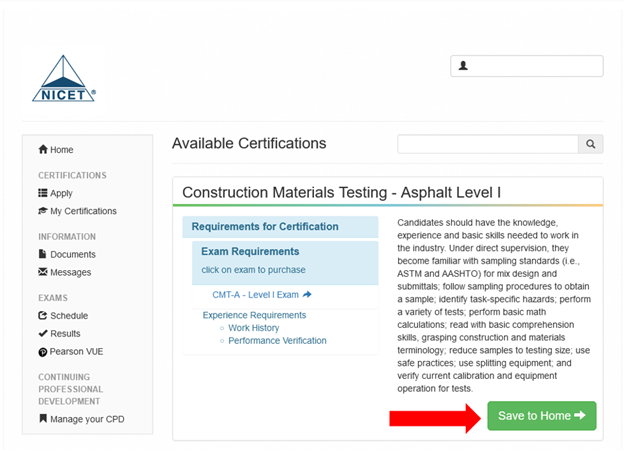
You may use the search bar to narrow down the selection or page through to find the certification(s) you are seeking. Click the green “Save to Home” button.
The Application Card now resides on your home screen.
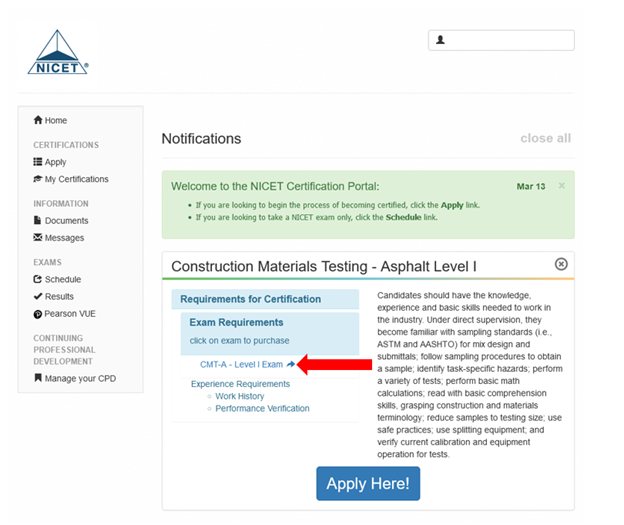
To purchase the exam, click the exam name on the left side of the Application Card.
You may also search for an exam another way. Click on “Schedule” on the left side navigation bar on the home screen.
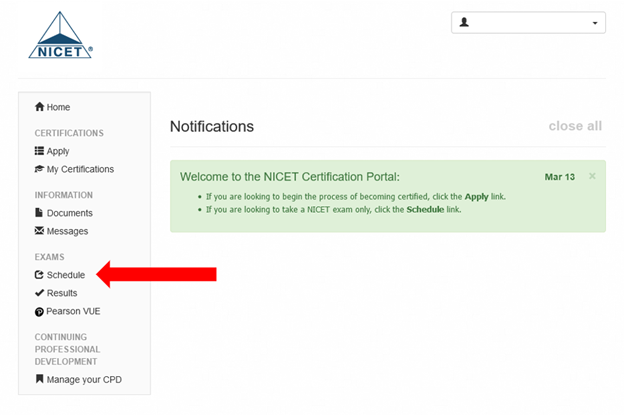
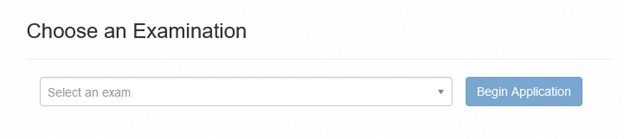
Scroll to “Choose an Examination”, where you will select the exam you want from the dropdown menu and then click “Begin Application”.
In both instances, you will be prompted to agree to an affidavit. If you disagree to the affidavit, then you will not be allowed to take any NICET exams. If you must return to the home screen, click “Home” on the left side navigation bar.
Once the affidavit has been agreed to, you will be prompted to confirm your interest in taking the exam and your payment choice. After you have completed this step, NICET will authorize you to take the exam. It will appear on your dashboard as such:
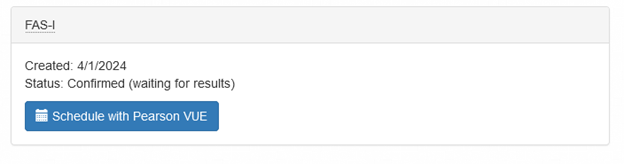
Click “Schedule with Pearson Vue”.
You will be asked how you want to take your exam. All exams for Levels II, III, and IV must be taken in person. For Level I exams ONLY, you may take the exam online or in person. In either case, please read and agree to all of the policies in full.
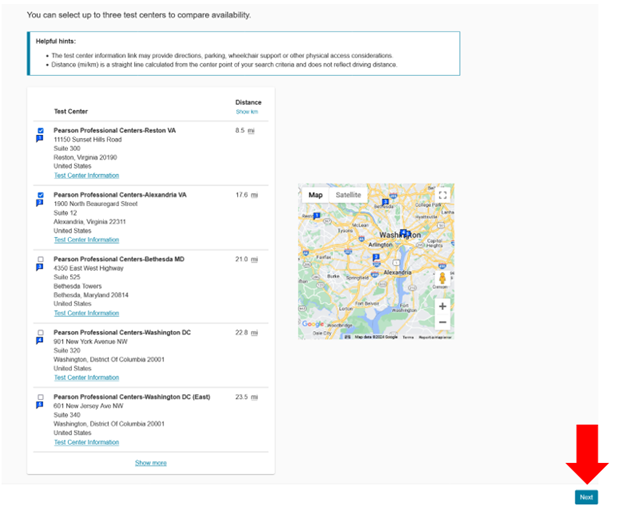
If taking your exam in person, you will be allowed to compare scheduling options between three locations and select a date and time of your choice. Once you have selected your test centers, click “Next” at the bottom right of the screen.
Select your location, preferred date, and preferred time, then click “Book this appointment”. From there, you will see a review screen. Check that all information is correct, then click “Next” at the bottom right of the screen.
If taking the exam online, once you have read and agreed to the policies, you will be prompted to confirm your time zone. From there, you will need to select a date and time. Click “Book this appointment”.
From there, you will see a review screen. Check that all information is correct, then click “Next” at the bottom right of the screen.
In both cases, once you have reviewed the details for your exam and accepted, you will see a confirmation screen and receive an email confirming your exam. If you do not receive your confirmation email from Pearson Vue, then you will need to repeat the above process. Instructions for rescheduling your exam can be found here.